Generating and upscaling video
Generate video from text or images, turn frames into video, and upscale clips for higher quality output.
The Video step turns prompts and stills into motion, animates frames into a clip, syncs a face to audio, and upscales finished clips — all inside the creative you're building. It's one of the production tools in AI generation, alongside images, audio, and lipsync.
Across the top you'll find five tabs: Text to Video, Image to Video, Frames to Video, Lipsync, and Upscale. Pick the one that matches what you have to start from. Before you generate, a cost estimate shows how much the run will use, so you can check your settings first.
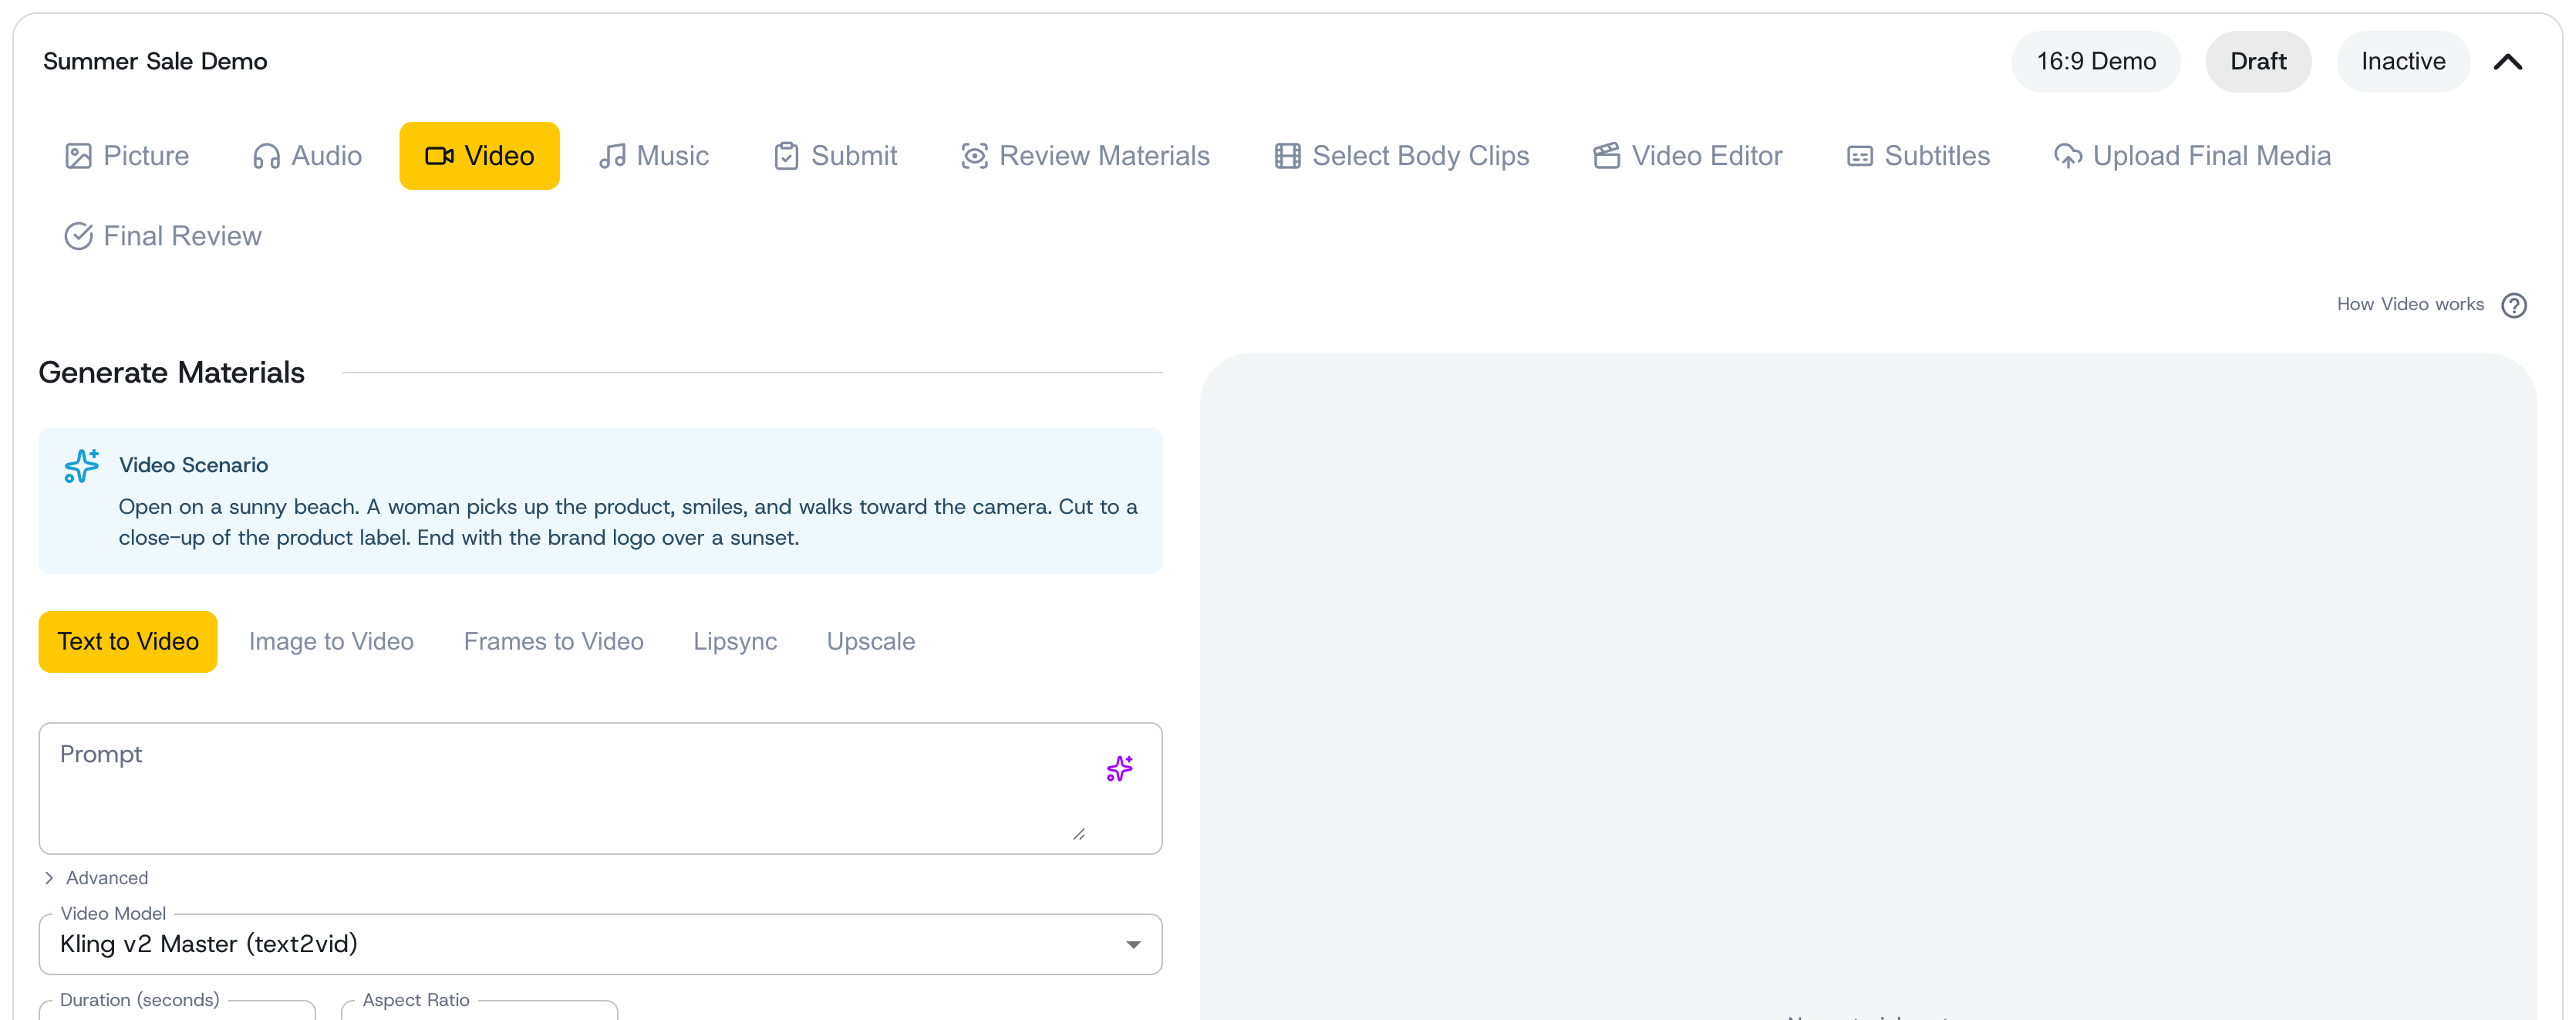 The Video step inside the creative editor, with its five generation tabs — Text to Video, Image to Video, Frames to Video, Lipsync, and Upscale
Text to Video
Describe a scene and AdFactory produces a clip from your words.
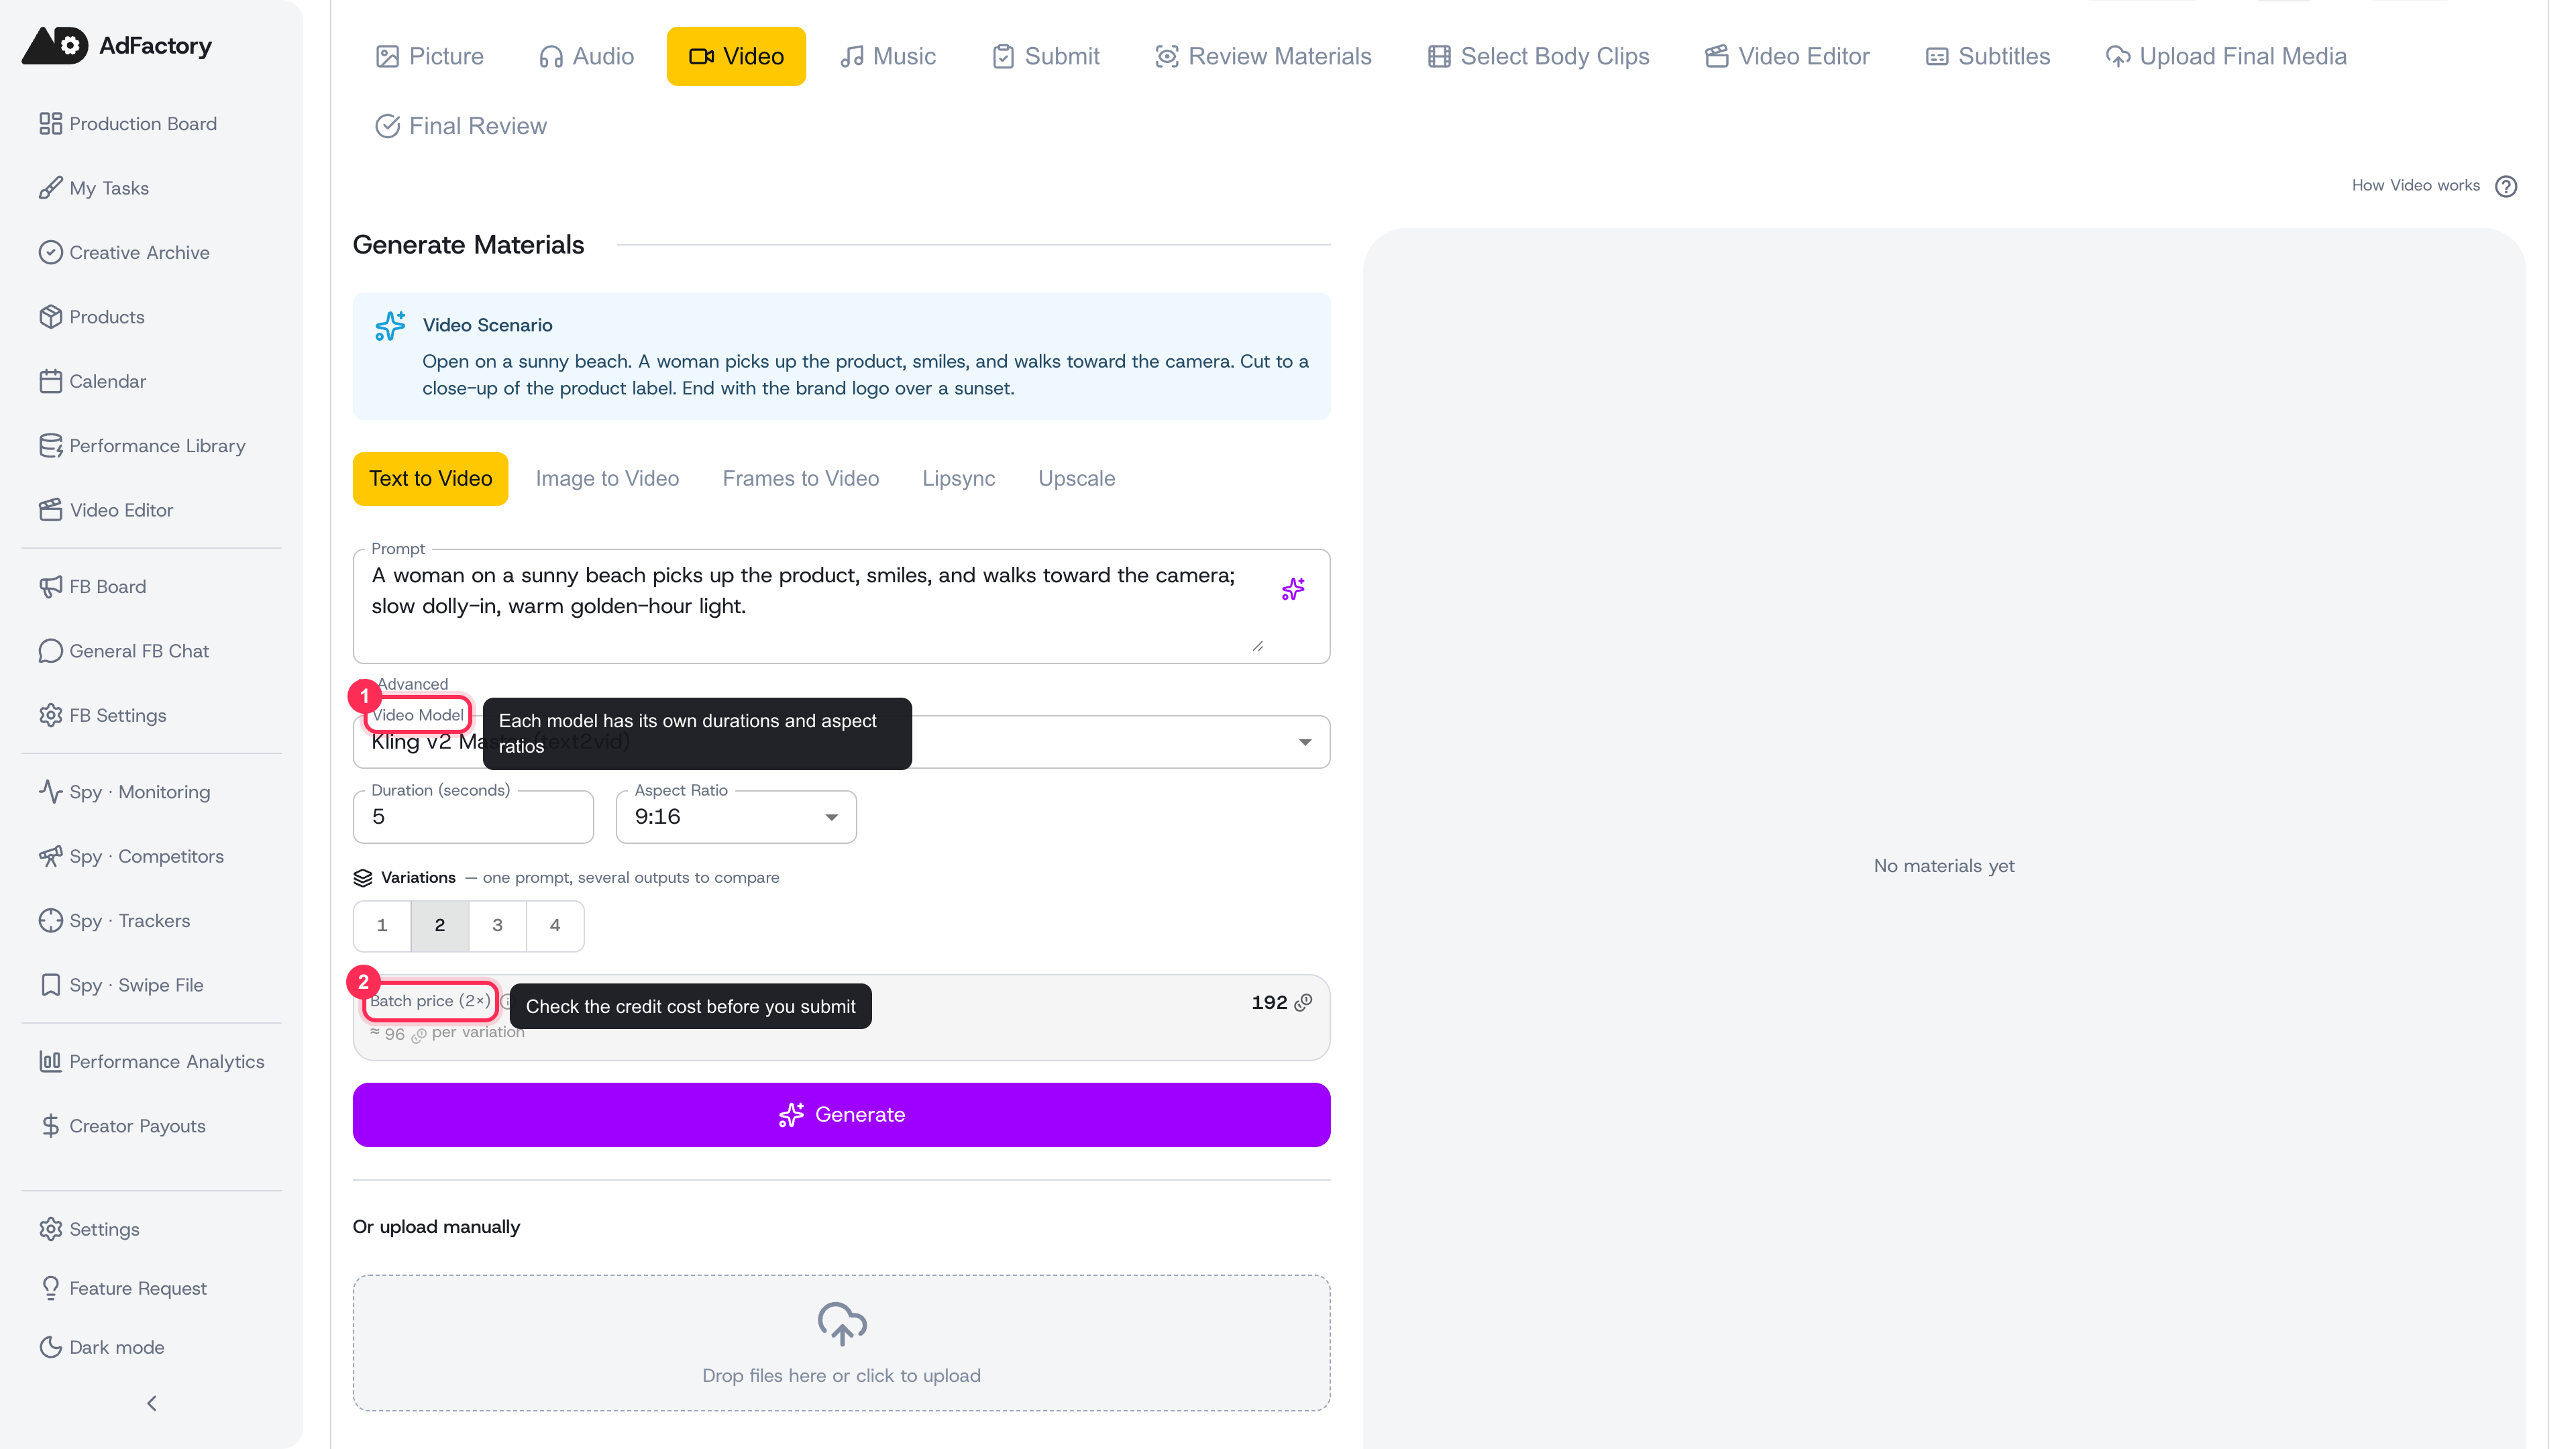 The Text to Video tab: a prompt, model, duration, aspect ratio, variation count, and the batch cost estimate above the Generate button
- Write a clear Prompt — name the subject, the action, the camera movement, and the mood.
- Choose a model. Each model offers its own durations and aspect ratios.
- Set the duration and the aspect ratio — vertical for feeds, square, or landscape. See creative formats for which fits where.
- Open the prompt's advanced area to add a negative prompt describing what to avoid (for example "blurry, distorted faces").
- Where the model allows it, raise the number of variations to get several takes at once. See variations and batch generation.
Generation runs as a background job, so you can keep working while it processes.
Image to Video
Pick one of your images and bring it to life with motion.
- Choose a source image from the pictures already in your creative — ones you uploaded or generated.
- Add an optional prompt to guide the motion, plus a model, duration, and aspect ratio.
- With some models a Generate native audio toggle appears: turn it on for a model-made soundtrack, or off for a silent clip. You can always add a voice-over later with lipsync or in the audio step.
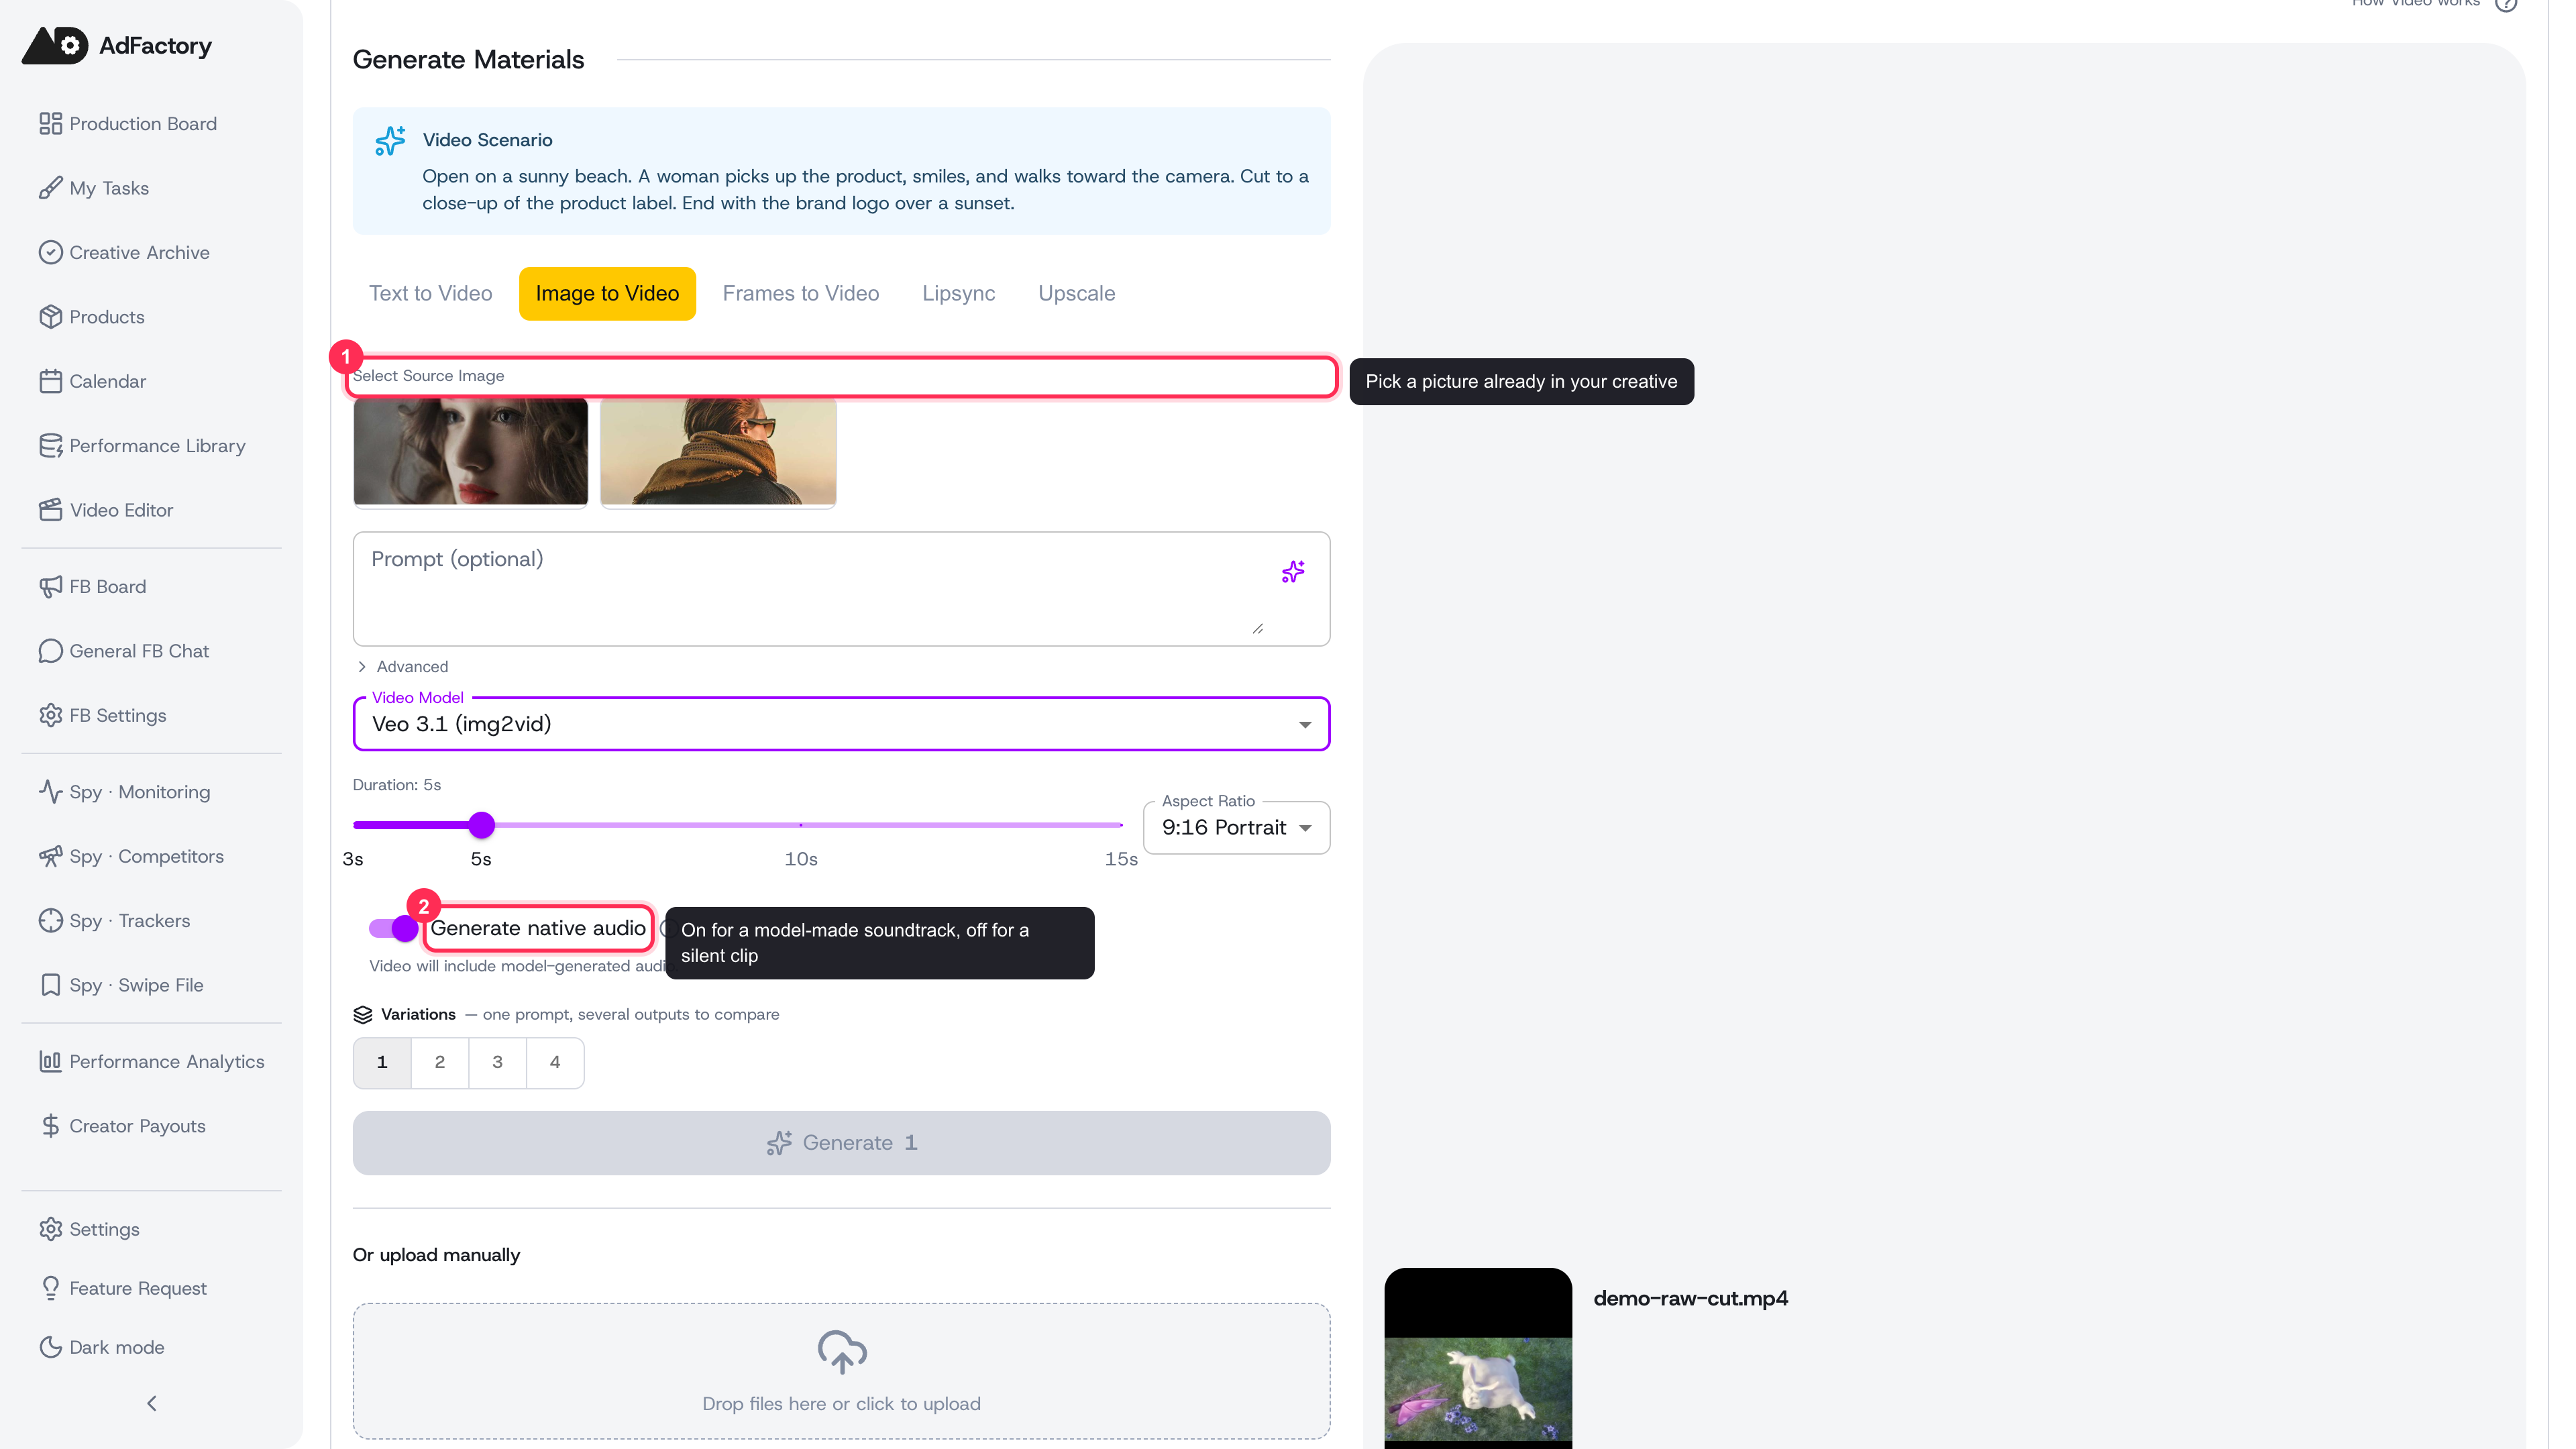 The Image to Video tab: pick a source image from your creative, then choose a model — some show a Generate native audio toggle
Frames to Video
Give the system a first frame and a last frame, and it fills in the motion between them — handy when you want to control exactly how a shot begins and ends.
- Select the first frame and the last frame from your pictures.
- Add an optional prompt describing the motion, then pick a model, duration, and aspect ratio.
This pairs neatly with Video keyframes in image generation: generate your two end-point frames there, then animate them here.
Lipsync
Sync a face to audio to create a talking avatar. You select an image, attach an audio track, and generate. For the full walkthrough, including face validation and model options, see lipsync. You can layer on subtitles and captions afterward.
Upscale
Take a clip you already like and raise its resolution for cleaner, sharper output.
- Select an existing video from your creative.
- Choose an upscale factor (for example 2x or 4x).
- Keep Preserve audio on to carry the original sound across, and adjust the name if you like.
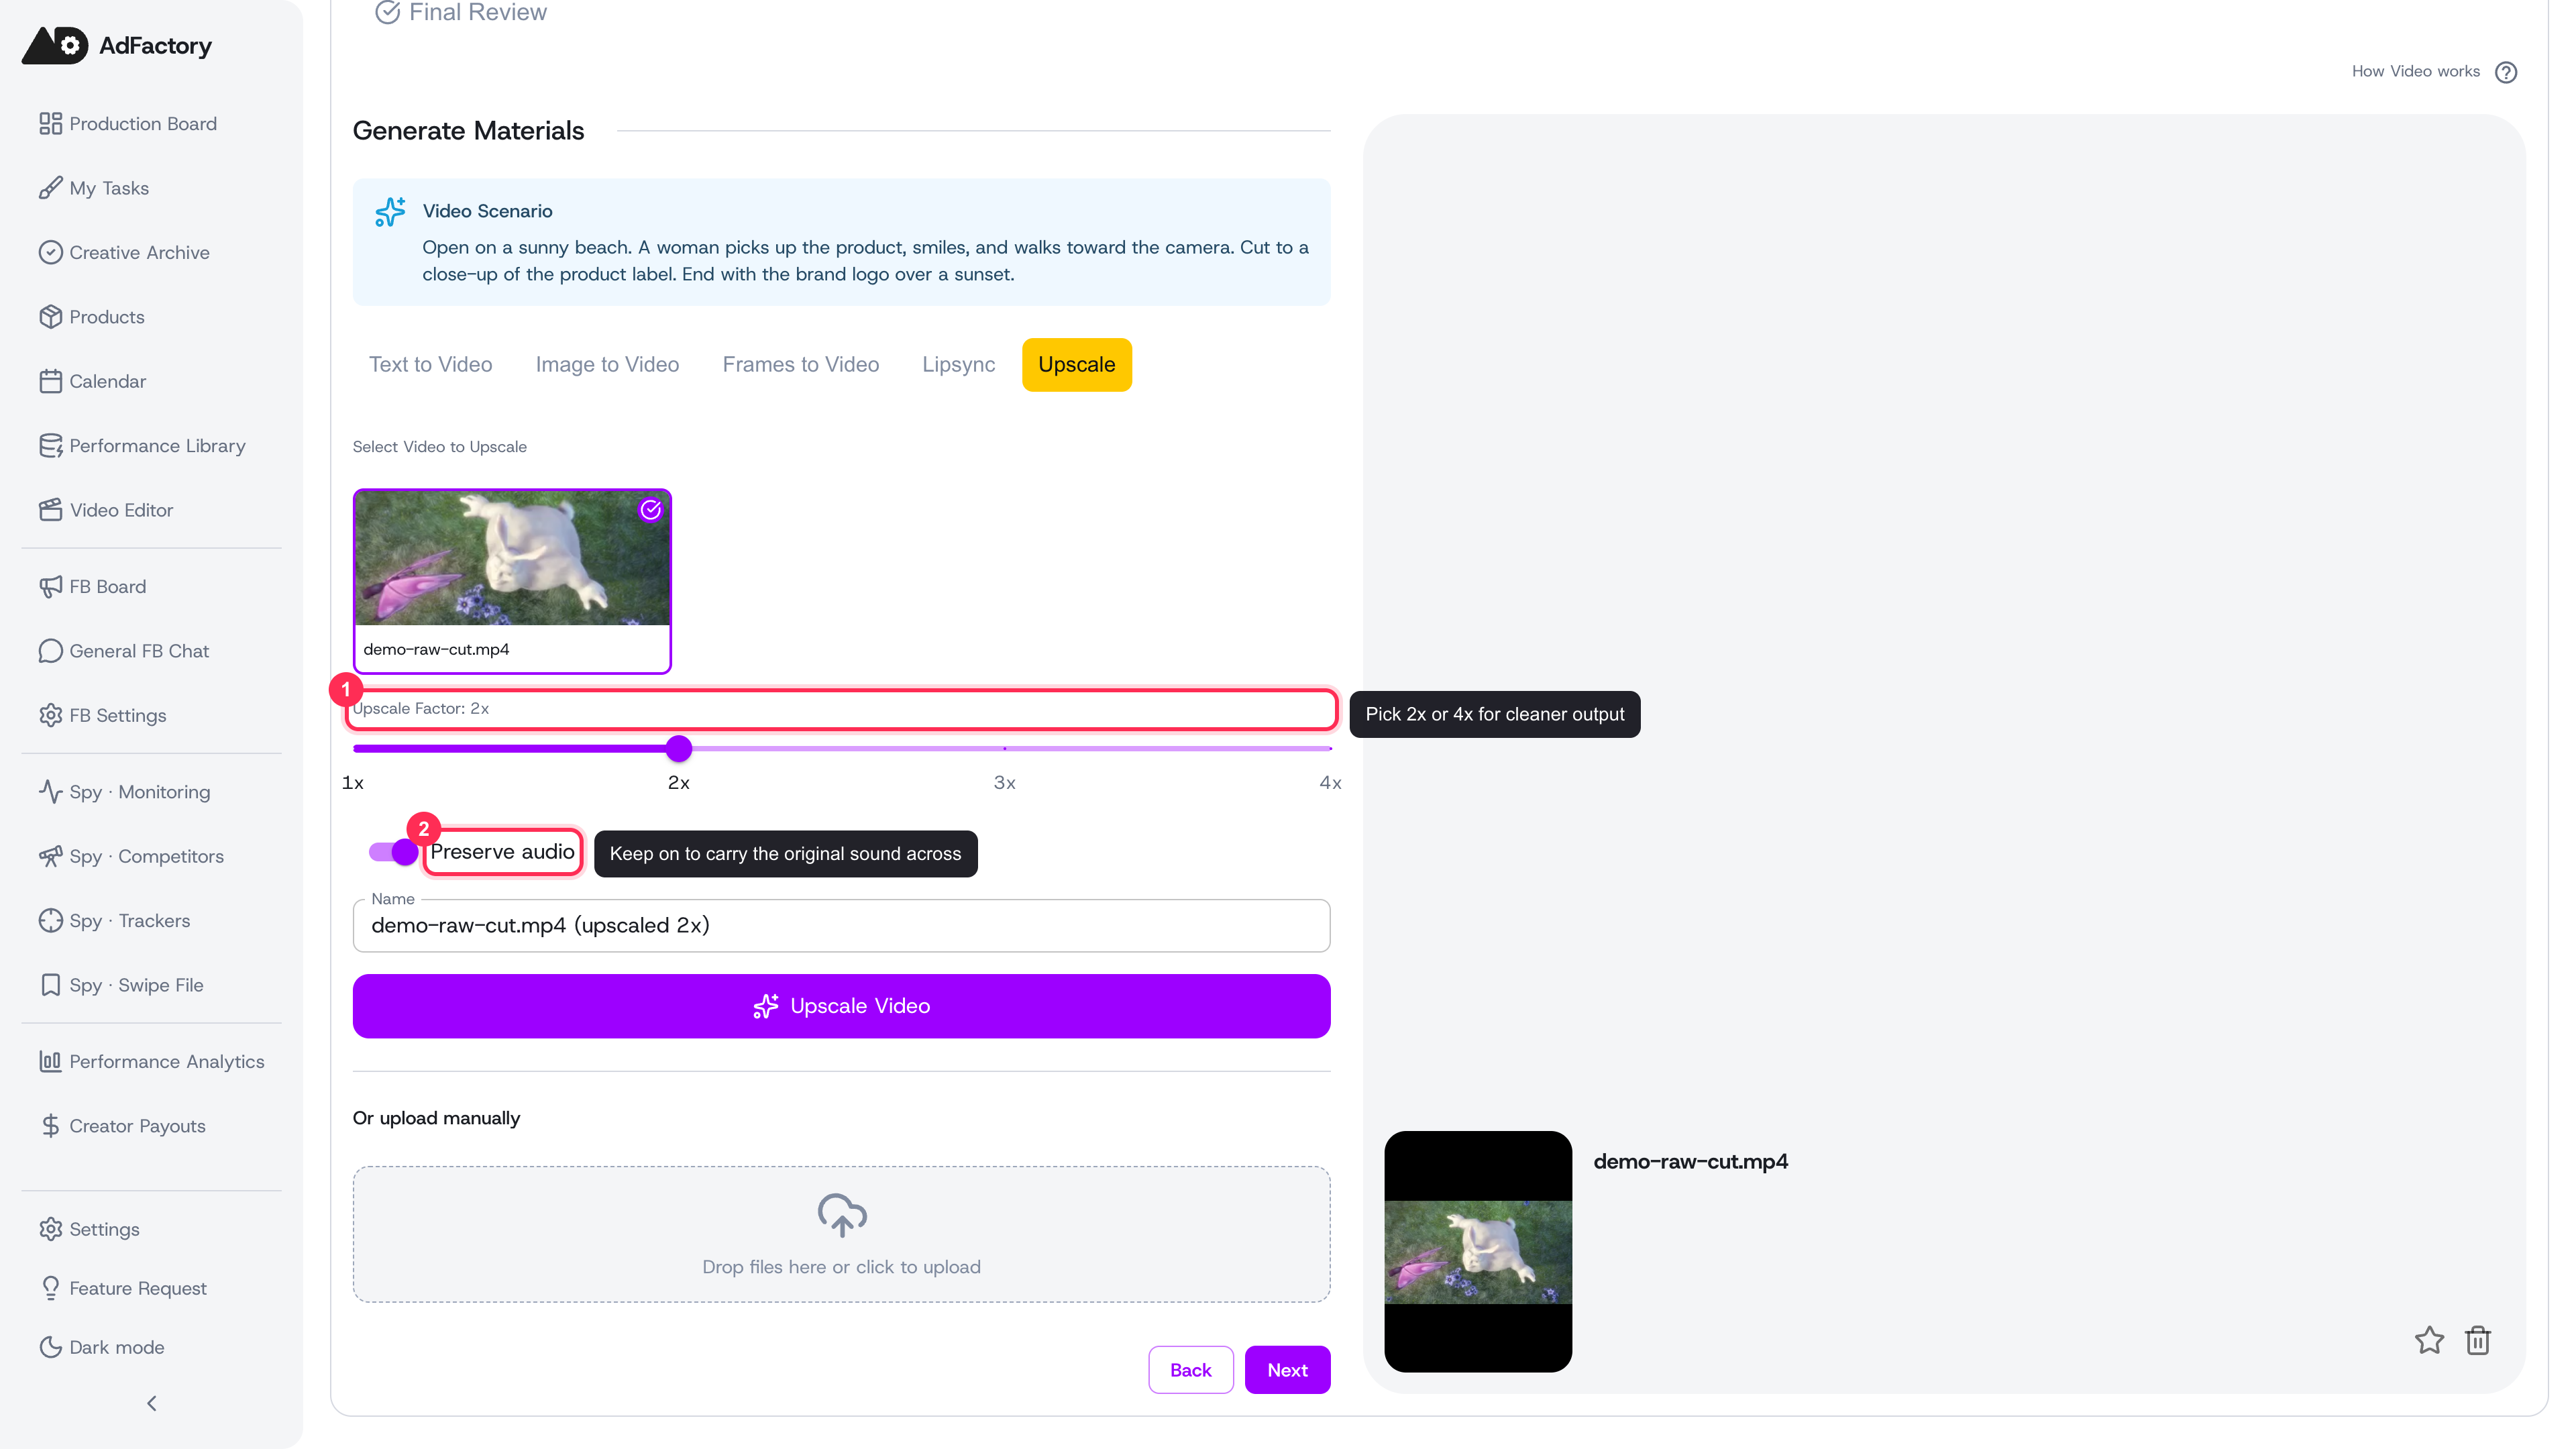 The Upscale tab: choose an existing clip, set the upscale factor, and keep Preserve audio on to carry the original sound across
Upscaling is ideal for polishing the winning version instead of re-generating from scratch.
Using your video in a creative
Generated clips become materials you can place into a creative. You can also bring in ready-made footage with body clips. When the clip is set, send the work into the creative review pipeline for approval.
Tips
- Be specific about camera movement and pacing — vague prompts produce generic motion.
- Generate short and iterate: a few short test clips reveal the right look faster than one long render.
- Credits are spent per generation, so review the cost estimate before submitting. See credits and payments.