Using the video editor
Assemble video clips, images, music, and voiceover on a timeline, trim and arrange them with transitions, then render a finished video — on its own or as a step inside a creative.
Open in appThe video editor is where you assemble a finished video from individual pieces — video clips, still images, music, and voiceover — on a timeline. You arrange and trim everything in the browser, preview it instantly, and then render the final file. The result is a regular creative you can review and approve like any other.
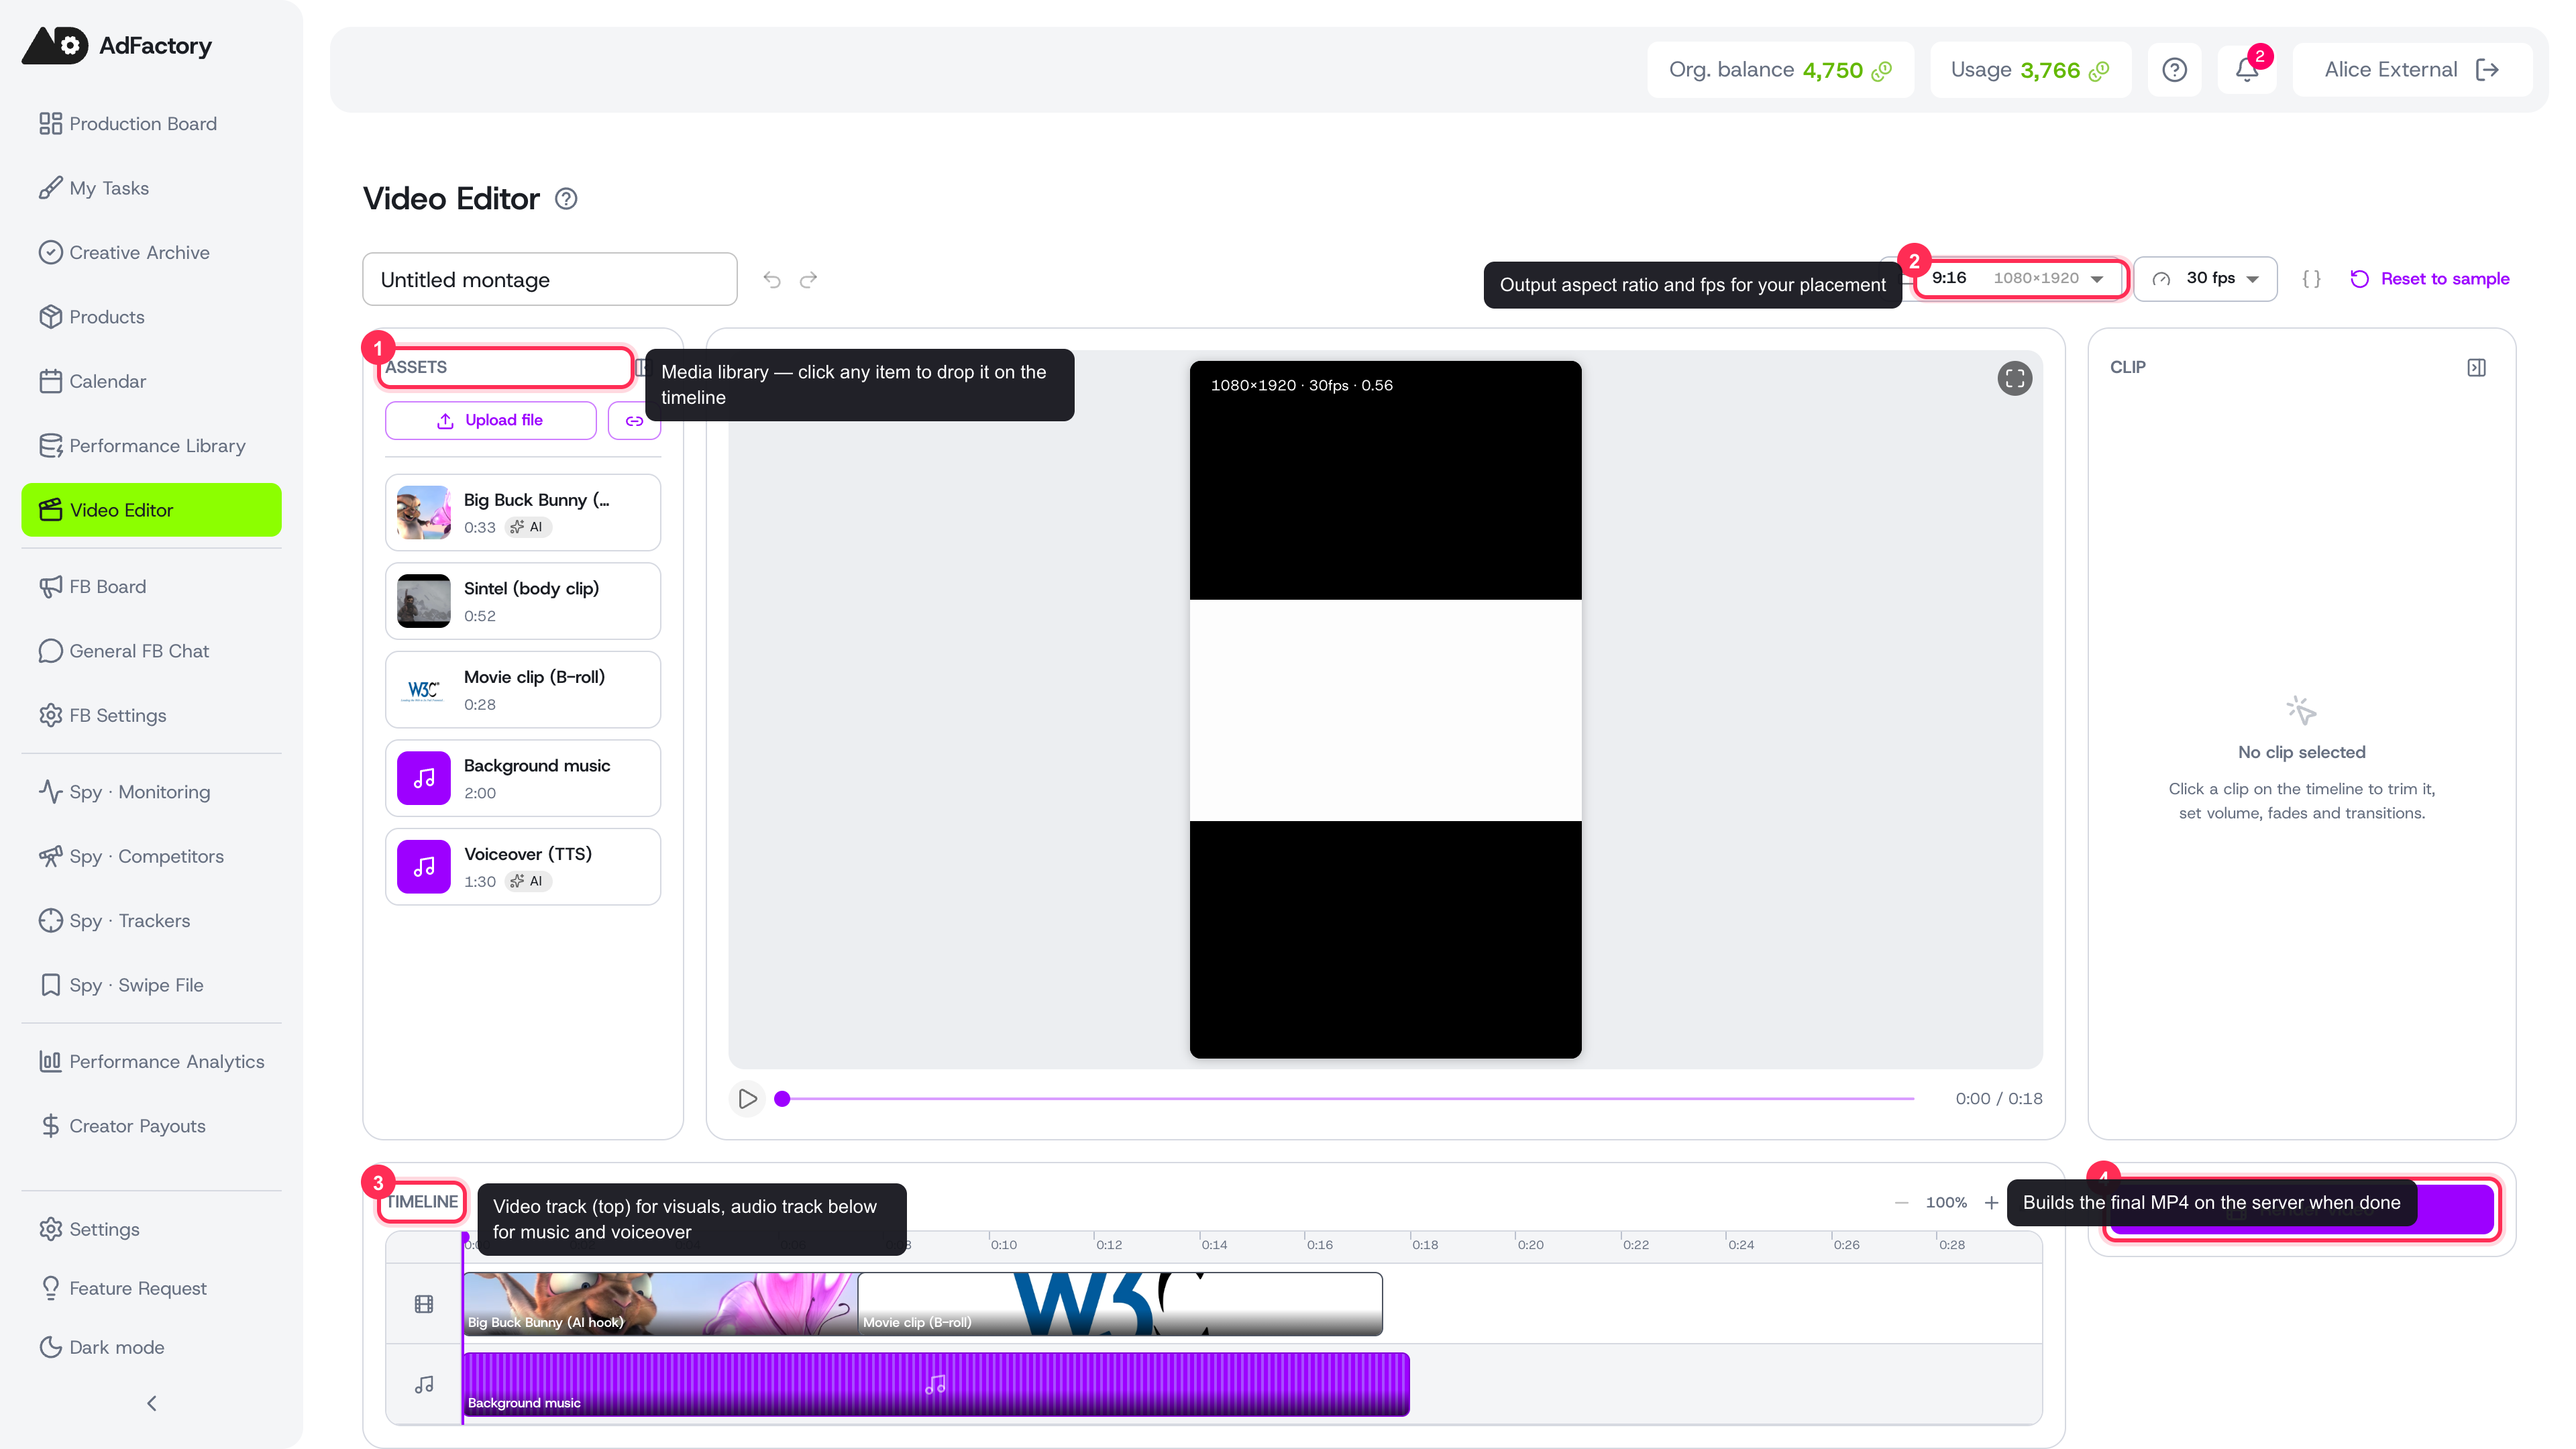 The video editor: Assets panel, preview player, timeline tracks, Clip inspector, and output controls
Bringing in your media
Everything you place on the timeline comes from the Assets panel on the left:
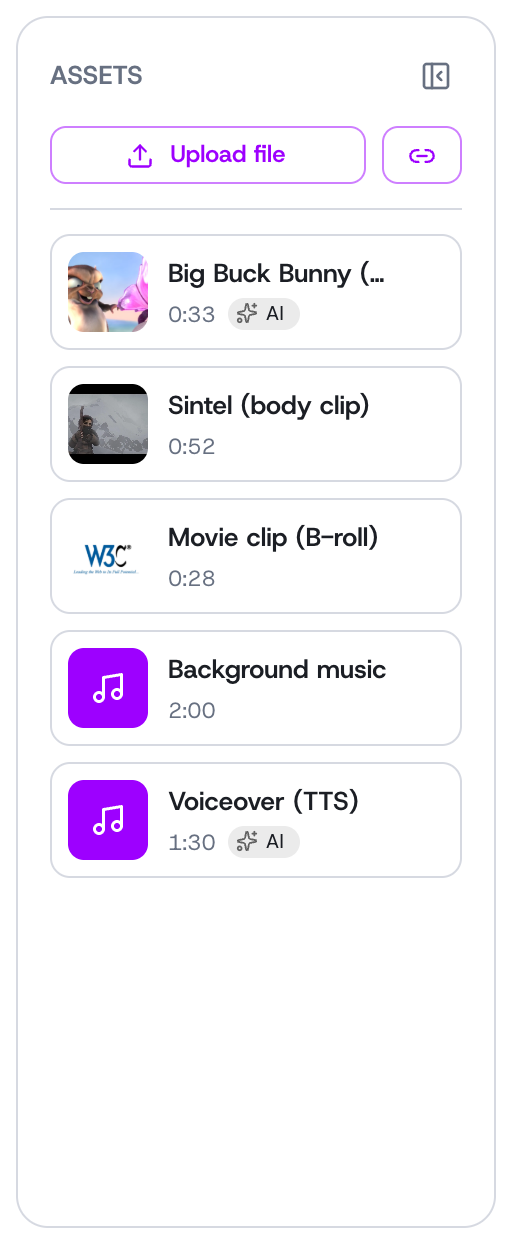 The Assets panel listing AI-generated media, uploads, and body clips
- AI-generated media — anything you produce with image, video, or audio and music generation shows up here automatically.
- Uploads — add your own file with Upload file, the same flow as uploading any material. You can also reuse body clips.
- A link — use Add by URL to pull in media from a direct link.
Click an asset to drop it onto the timeline.
Arranging the timeline
The timeline has two kinds of track:
- A video track for the visuals — video clips and image stills.
- An audio track for music and voiceover, which plays underneath the whole video.
New clips are placed in sequence after the last one. Drag a clip along its track to change where it starts, or drag either edge to trim it — the left edge sets the trim in, the right edge sets the trim out.
Moving the playhead. Drag anywhere on the time ruler to scrub the playhead smoothly, or click a spot to jump straight to it. The preview follows the playhead as you move it.
Zooming the timeline. By default the timeline fits the full width of the panel. Scroll the mouse wheel over it (or Alt-drag the ruler) to zoom in and out around the cursor; the zoom controls in the timeline's top-right corner also step the zoom and reset it back to Fit.
Undo and redo. Every timeline edit — moving, trimming, adding, or removing clips, and inspector changes — can be undone. Use the ↶ / ↷ buttons next to the project name, or Ctrl/⌘ + Z to undo and Ctrl + Y / Shift + Ctrl/⌘ + Z to redo.
Trimming, timing, and speed
Drag a clip's left or right edge on the timeline to trim it in place, or select the clip to open the Clip inspector on the right for exact values:
- Trim in / Trim out — cut the clip down to the part of the source you want (dragging the clip edges does the same thing).
- Timeline start — the exact second the clip appears in the video (dragging does the same thing).
- Speed — play a clip faster or slower (0.25×–4×); its on-screen length changes to match.
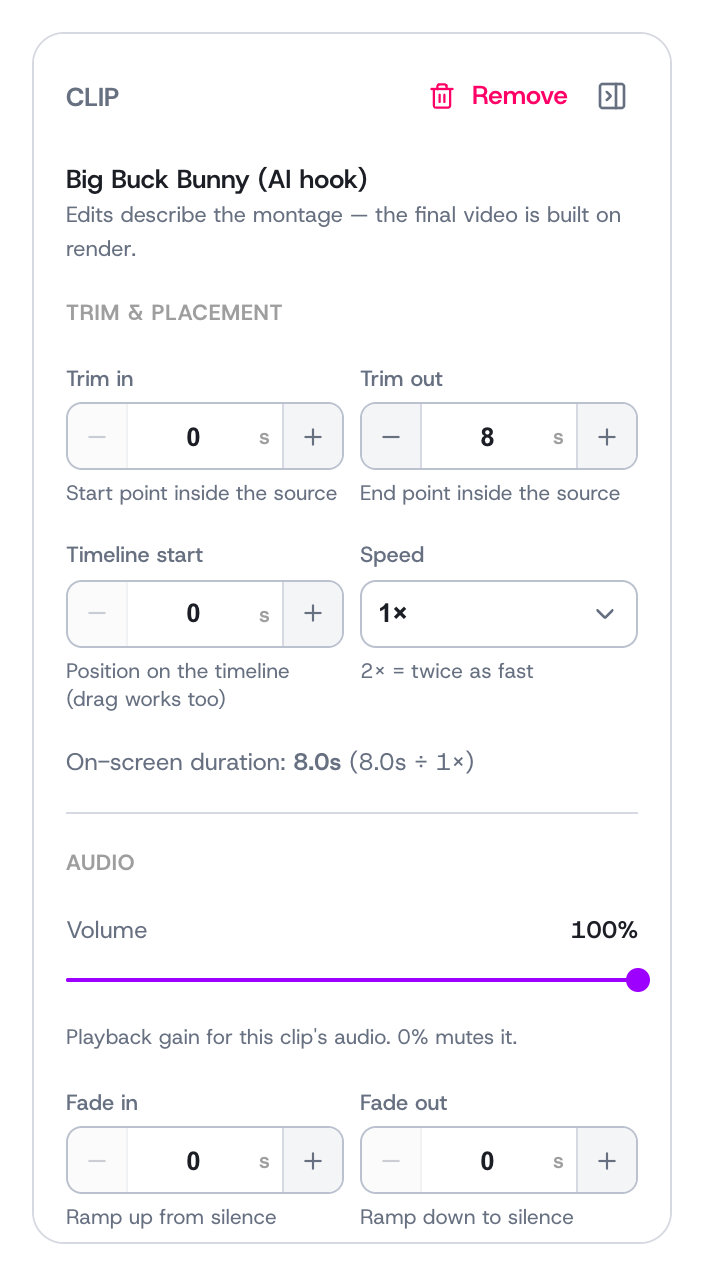 Selecting a clip opens the Clip inspector with trim in/out, timeline start, speed, volume, and fades
Audio: music and voiceover
Audio clips live on the audio track and have their own controls in the inspector:
- Volume — set the level for each clip; for example, keep background music low under a voiceover.
- Fade in / Fade out — ramp the sound up at the start or down at the end.
A common mix is generated music at low volume with a voiceover on top.
Transitions
To blend one clip smoothly into the next on the same track, turn on Blend into the next clip in the inspector and pick a style — Fade, Dissolve, Wipe left, or Slide right — and how long the blend lasts.
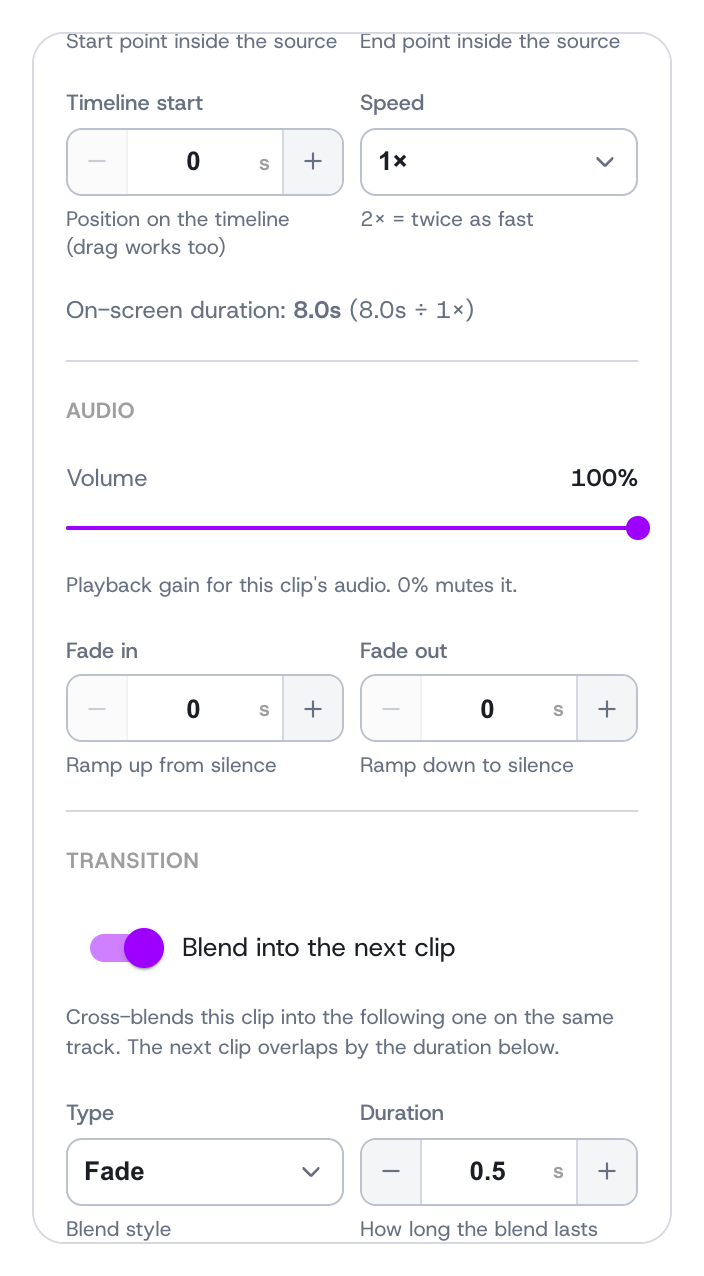 The Transition controls: Blend into the next clip turned on, with a Fade style and a blend duration
Images and title cards
You can drop still images onto the video track too — perfect for an opening title or a closing card. Add them from your generated images, an upload, or a link, just like any other asset.
Because an image has no length of its own, you set how long it stays on screen with the Duration field in the inspector (it defaults to 5 seconds), and you can blend it into the next clip with the same transitions. The volume and fade controls are hidden for images, since a still has no audio. Chaining a few stills with transitions is an easy way to build a slideshow or a polished outro.
Choosing the output format
Set the video's aspect ratio and frame rate for the placement you're targeting — for example 9:16 for vertical feeds, 1:1 for square, or 16:9 for landscape. This mirrors the creative formats used across the platform, and the preview updates to match.
Preview and render
Use the player to scrub and play your montage and check the timing. When it looks right, hit Render — the platform builds the final MP4 on the server. You can preview and download it right away. When you're editing inside a creative, you can also add the render to the creative or set it as the final media in one step (see below).
Inside a creative
The editor also appears as the Video Editor step of a creative, between Select Body Clips and Subtitles (for reviewers and creator-reviewers). There it works the same way, with two conveniences:
- The Assets panel is pre-filled with that creative's own materials — everything generated or uploaded on the creative is ready to drop onto the timeline. Files you upload here are also saved back as materials.
- Your montage is saved as a draft automatically and restored when you come back, so you can leave the step and return without losing your arrangement.
Once a render finishes, two actions appear:
- Add to creative — saves the rendered video as a source material on the creative.
- Use as final media — sets the render as the creative's final media and submits it for final review in one step. You can still replace it later from the Upload Final Media step.