Benchmarks
Compare performance against per-product benchmarks to know whether a creative is over- or under-performing.
Open in appBenchmarks let you define what "good" looks like for each product, so you can tell at a glance whether a creative is over- or under-performing. Instead of staring at raw numbers, you set the expected range for every metric that matters and let AdFactory score performance against it.
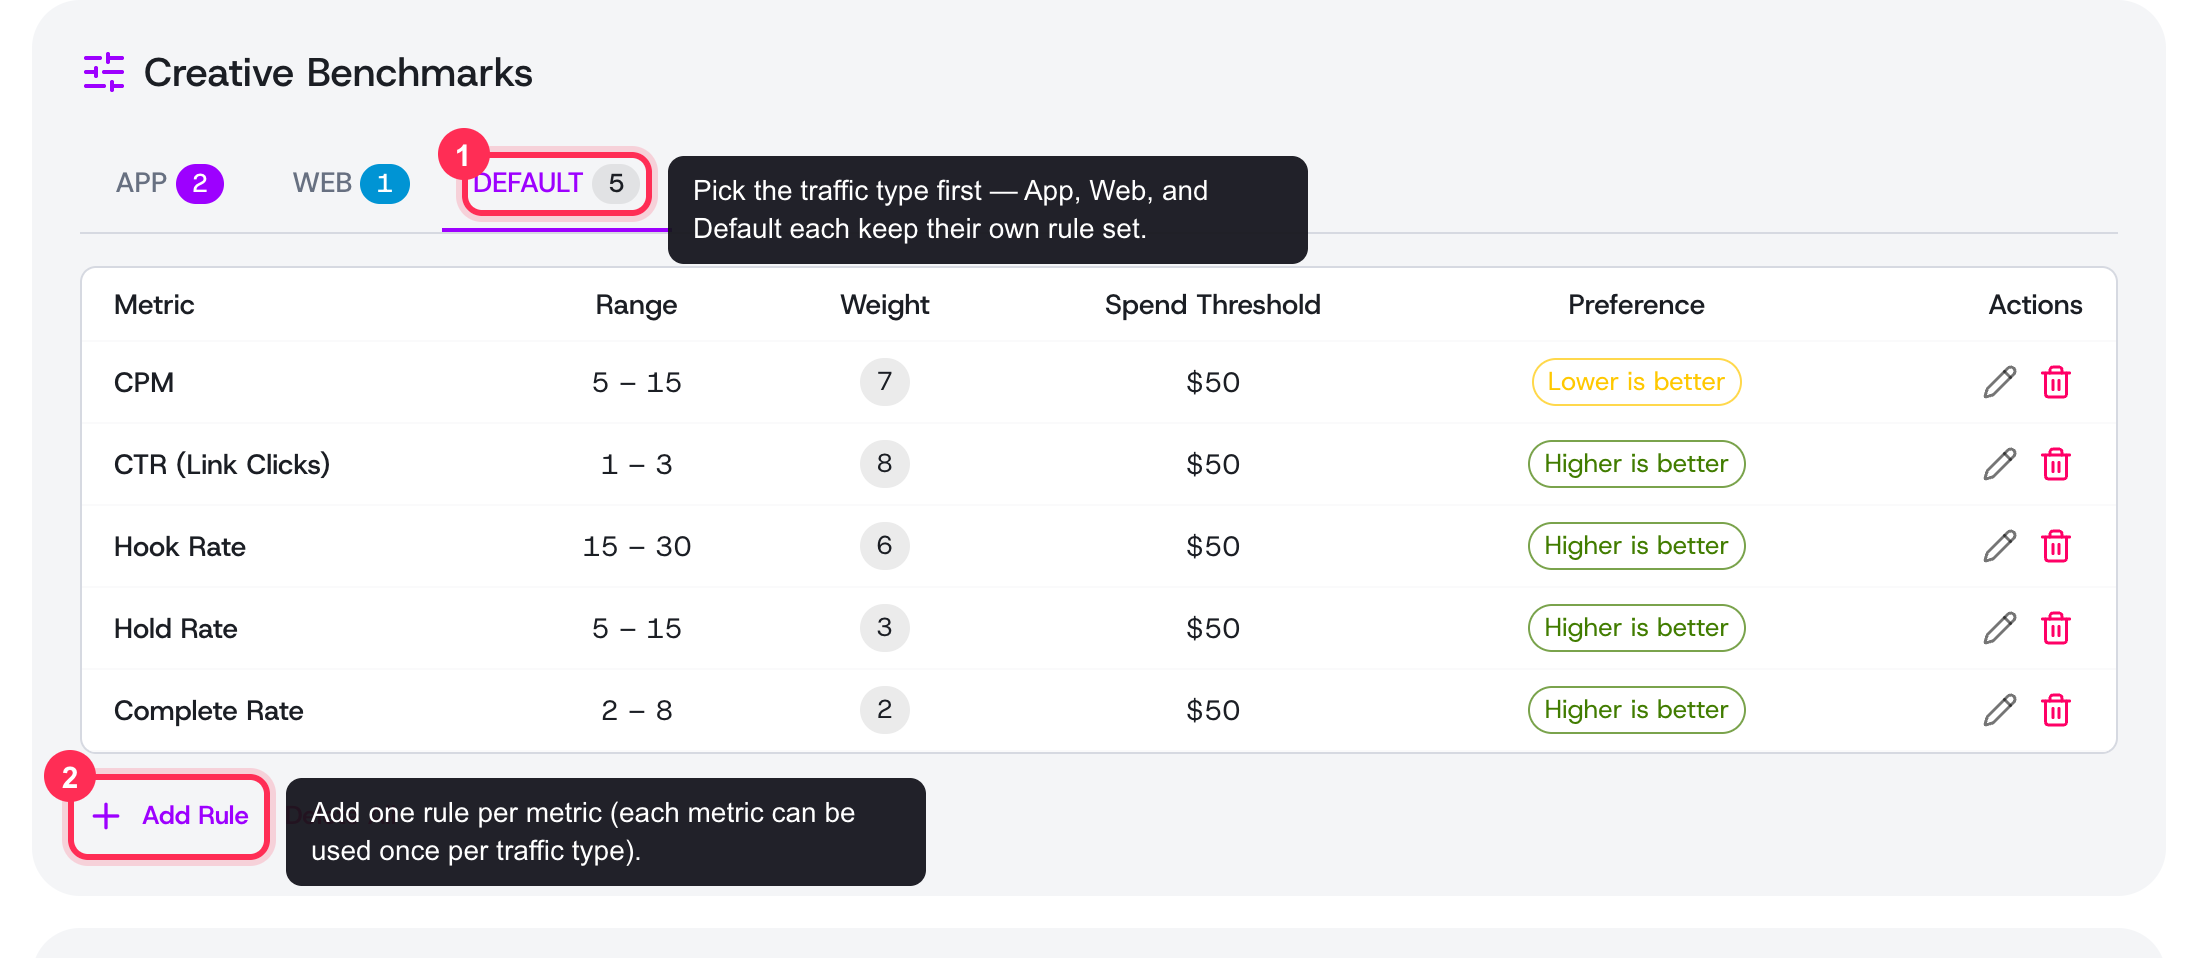 The Creative Benchmarks card on a product profile: pick a traffic-type tab, then read each metric's range, weight, spend threshold, and preference
What a benchmark is
A benchmark is a set of rules attached to a single product. Each rule covers one metric — for example CPA, ROAS, CTR, or Hook Rate — and tells the platform how to judge a value for that metric. You can build a different set of rules for each kind of traffic:
- App — rules for app-install or in-app conversion campaigns.
- Web — rules for website traffic and on-site conversions.
- Default — fallback rules used when traffic type isn't specified.
Anatomy of a rule
Each rule has a few simple settings:
- Metric — which number you're scoring, such as CPA, CPM, ROAS, Hook Rate, or Hold Rate.
- Range (bottom and upper edge) — the low and high values that frame acceptable performance.
- Preference — whether higher is better (ROAS, CTR) or lower is better (CPA, CPM). Each metric suggests a sensible default.
- Weight — how much this metric counts, from 1 to 10, when several rules combine into an overall picture.
- Spend threshold — the minimum spend a creative needs before the rule is applied, so early, low-data results don't trigger false signals.
Setting up benchmarks
Benchmarks live on the product profile:
- Open the product whose performance you want to measure.
- Go to the benchmarks section and pick the traffic-type tab (App, Web, or Default).
- Add a rule, choose a metric, set its range, weight, spend threshold, and preference.
- Repeat for every metric you care about, then Save Benchmarks.
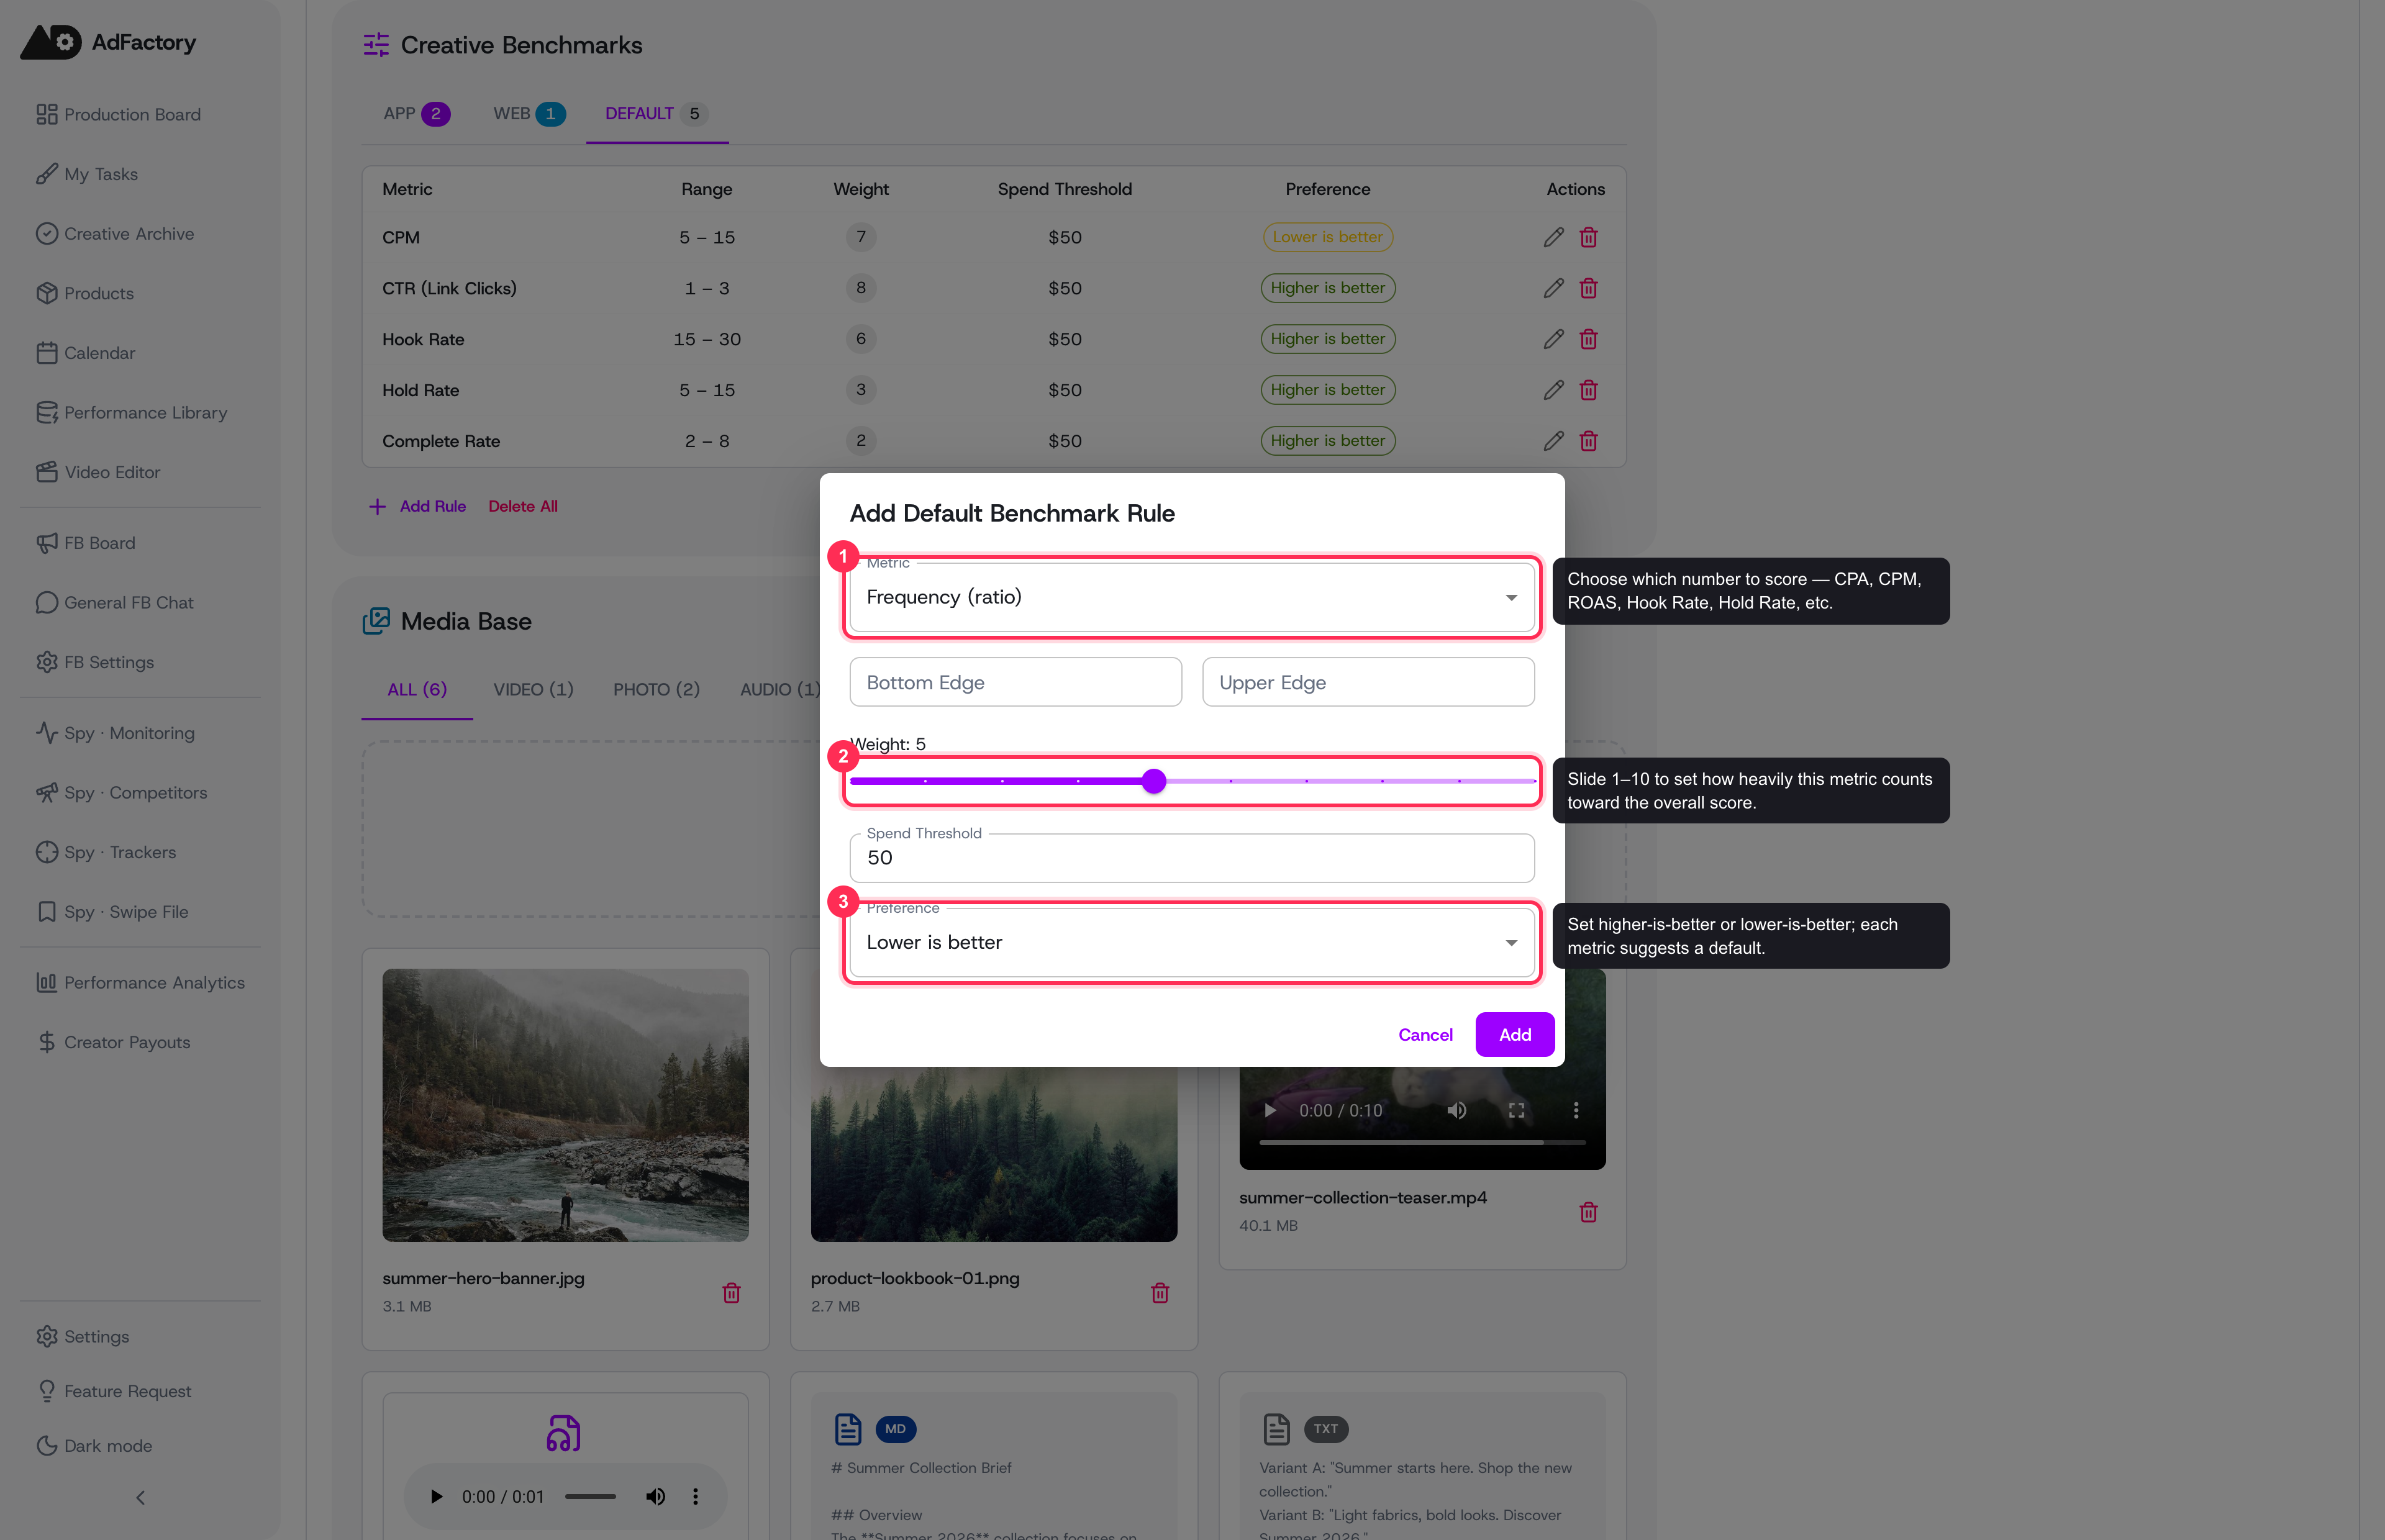 The Add Rule dialog: each rule scores one metric with its own range, weight slider, spend threshold, and preference
Once you have added the metrics you care about, save the whole rule set for that traffic type — nothing is scored until you do.
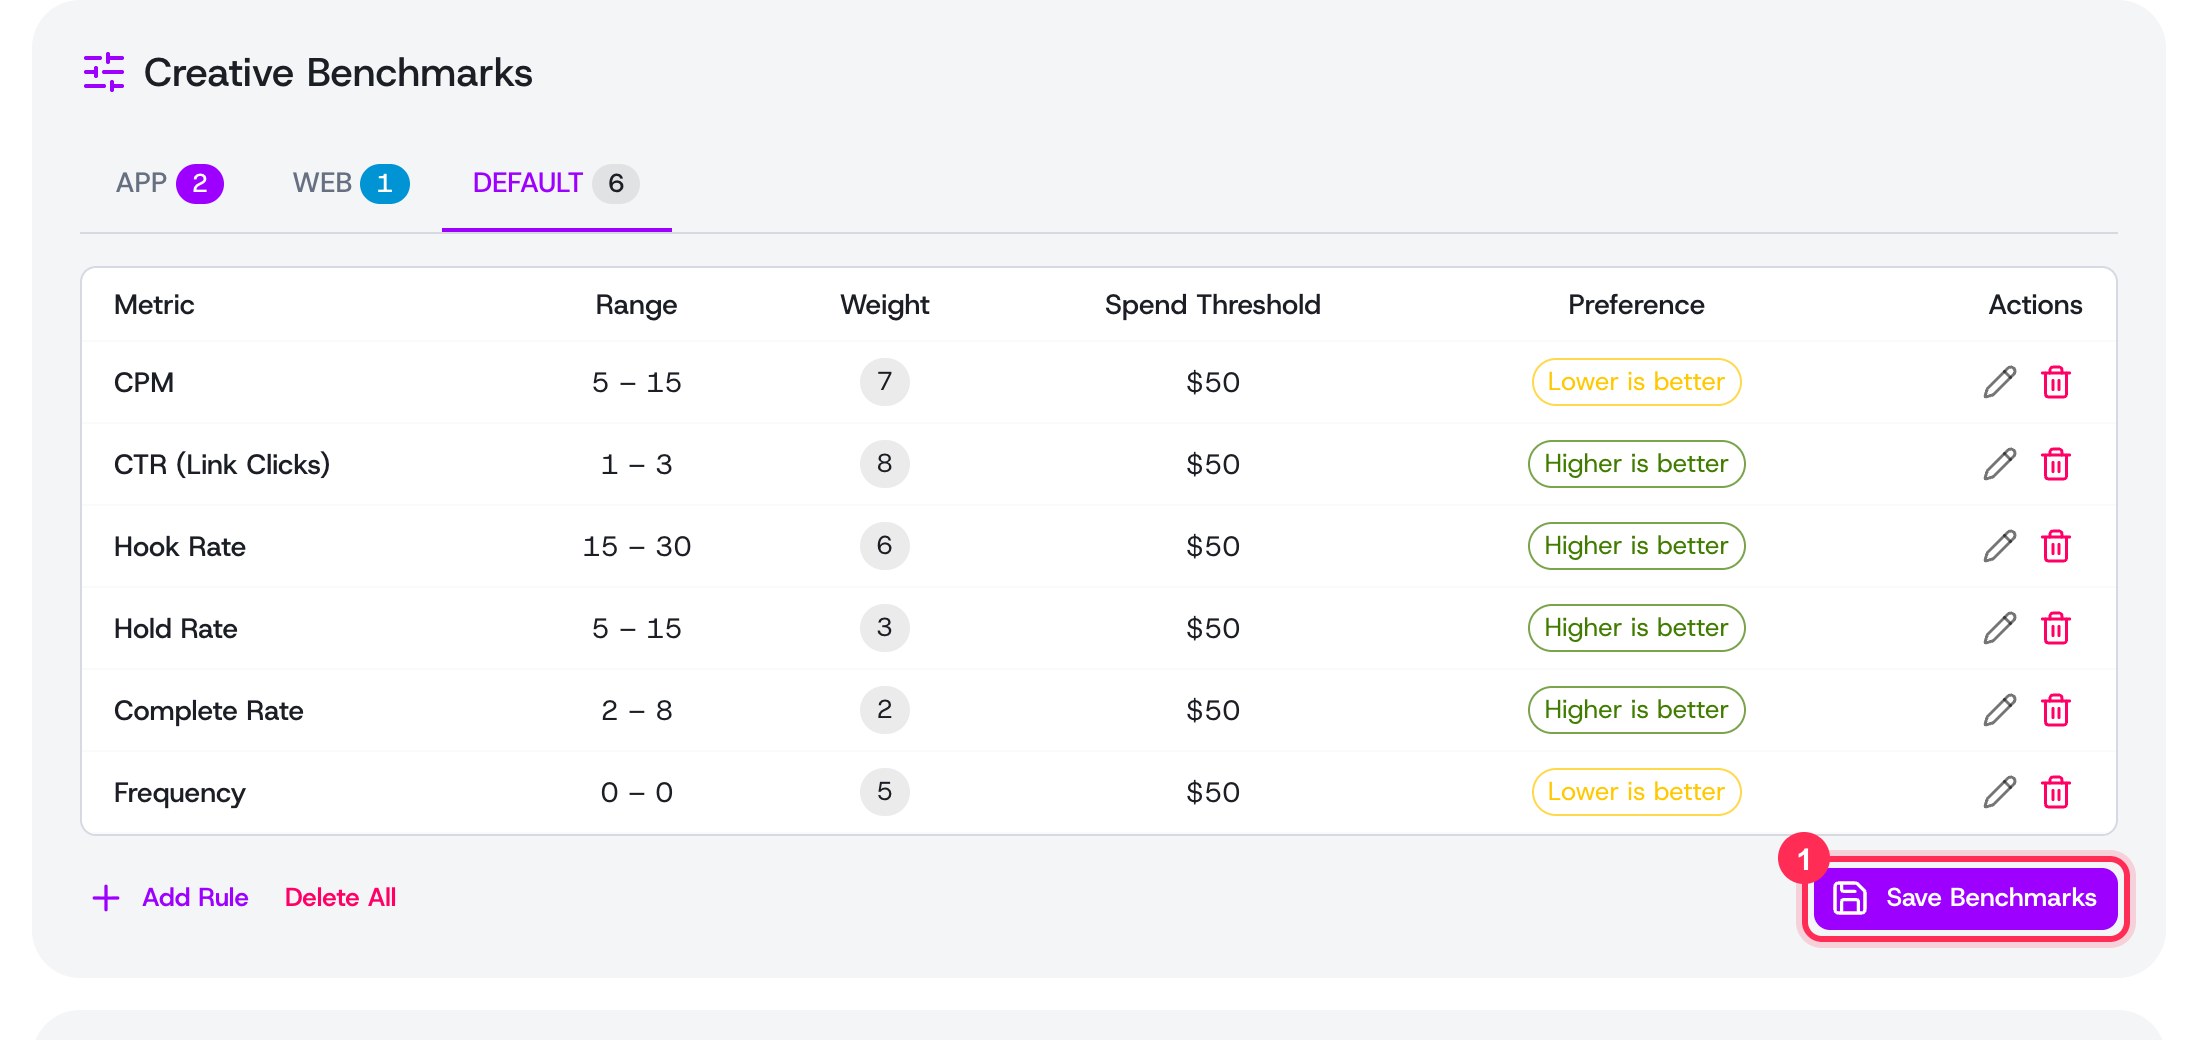 Save Benchmarks persists the full rule set for the selected traffic type
You can edit or remove individual rules at any time, or clear all rules for a product at once. Each metric can be used only once per traffic type, so your rule set stays clean.
Putting benchmarks to work
Once benchmarks are set, performance data is judged against them automatically — making it obvious which creatives are pulling their weight and which need attention. Pair benchmarks with the analytics dashboard to track CPA, revenue, and spend across your approved creatives, then turn under-performance into action by creating a task to test fresh angles.
Tips
- Base your ranges on real account history, not aspirations — a benchmark you never hit isn't useful.
- Give your most decision-critical metrics (like CPA or ROAS) a higher weight.
- Set spend thresholds so a creative is judged only after it has had a fair chance to spend.